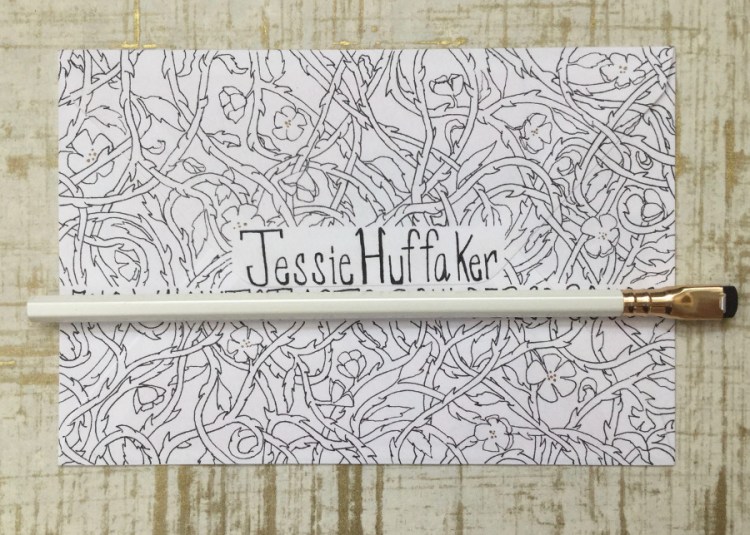
Summer Break

Summer’s in full swing and your bloggers here (that’s Claire and Jessie) are taking a break to bask in the sun, travel, and also just be super stupid busy. There may be some sporadic posts, but our normal Tuesday and Saturday posts will not be happening. We’ll return in a few weeks all fresh and revitalized.

Enjoy these long summer days!

Be Right Back, faux calligraphy and watercolor

COLOR!!!

Normally, I would avoid using all caps and extra exclamation marks, but this week I’ve been doused, dazzled, drowned in color and the excessive title is necessary to convey my color-drunkeness.

It all started when I recently funded a Kickstarter campaign by the watercolor artist Stephanie Law. She’d long been using a mini-watercolor palette of her own design, and I, like so many others, had coveted this dandy little paint palette. She had so much interest she started a campaign to fund the production of these palettes, and now sometime around September I’ll be getting my very own!

Daniel Smith Watercolor Dot Chart

Because these palettes don’t come pre-filled with colors I’ll need to choose my own 36 colors to fill it with. This means buying watercolors tubes rather than the dry pans I’ve been using so far. A while back I’d received a Daniel Smith Watercolor Chart, which has dot samples of all 240 watercolors they make (!), so this week I made dark and light swatches of each color to see what ones I might want to add to my future palette.

Daniel Smith Watercolor Dot Chart Painted

It’s a fact that some colors make each of us instantly crazy in love. Oh, if only I could drink that color, swim in it, wear tinted glasses so it glazed the whole world! Oh, if there’s a heaven these are the colors that adorn it! And then, there’s the polar opposite colors, the horror-shows! They hit my gag reflex, make me wish I could visually purge them from my retinas, tear the color from my visual cortex before my brain can translate it. A color to make babies cry, dogs howl, and one which should only be used for cheap wallpaper in hell. It’s also a fact that the colors that evoke bliss or hate are completely dependent on the individual, so if you don’t judge my taste, I won’t judge yours!

I still have a while to wait for my palette, but I’m going to get some of these tube colors early, as I’ve been wanting to explore the difference between tubes and pans for a while. An intense shade of watercolor is much easier to achieve with the wet tub paints, and I’m hoping some of the issues I’ve been having with painting will be cleared up as I learn more about transparency, granulation, and staining with my new paints.

Terra Cotta FTW!

I don’t really have much for y’all this week EXCEPT that I painted a terra cotta pot. It has been on my to-do list since April to repot my peace lily. At first, I wanted to get one of those bougie pots that they have on Instagram but I felt like spending $45 on a pot would be super extra. BUT THEN I remembered that I could paint a terra cotta pot and get a vibe going. SO! I bought a pot, grabbed my acrylic paints, brushes, gel medium to thicken the paint, and some gloss medium and varnish to use as a topcoat over the paint.

Here is what I started with.


At first I was going to do a cool design. I even sketched birds on the pot. It was going to be a very life-changing pot, y’all. I wanted to have a base color that would make everything else really pop. So, I mixed a tiny bit of blue with white to make a super-light blue. Here is how it looked.

By the time I finished the layer of blue I was over it. My bird idea was out the window. OVER IT. I played with the idea of distressing the paint so that it could look edgy and shabby chic. It didn’t work. However, I wanted that type of vaguely raggedy effect though. So, I grabbed a fan brush and some orange, red, and yellow paint. I mixed the colors in a hella willy-nilly way and then slapped that paint on the pot. Here is the end result. I dig it. The best thing about this is that I can just slap some more paint on when I’m not feeling it anymore.

Father’s Day Card

I hadn’t planned on doing another post on handmade cards so soon, but then Father’s Day was incoming and I spent days working on the card for my Pa. So, since this is what my week mainly creatively consisted of, here’s ANOTHER HANDMADE CARD!

I knew I wanted to do a knight theme for my dad. I’ve joked to him many times that he’s my knight in shining armor, with trusty energy drink in hand. Every time I’ve ever needed help, he’s immediately responded, and with the assistance of endless cans of Monster, Rockstar, and Redbull he has seen me through to safety. Example: He drove all the way out from Utah to Philadelphia in just two days when I told him I couldn’t stay there anymore (aka a relationship ended badly). So, yes, he’s a knight who drives a brown bubble-shaped van and leaves endless cans in his wake, but my knight nonetheless!

The initial drawing for my Father's Day card

On Friday, I started with a pencil sketch copying the design from a card I’d bought by the Rifle Paper Co. and had intended to send to my Dad, before I declared this the year-of-only-sending-out-handmade-cards. The energy drink is obviously my own addition. I used a gold permanent marker to draw over my pencil sketch and a few waterproof markers for the can. Then I did a simple light wash of gold watercolor, followed by a final wash of Quinacridone Coral sprinkled with salt for the background.

My Father's Day card

On Saturday, after decorating the back of the card (not shown here because personal messages are, well, personal) I intended to do a quick design for the envelope and send it out with plenty of time to get there. I wanted to stick with the knight theme by using a large letter font in the style of an illuminated manuscript for the front envelope address. This ended up taking TWO DAYS! First, I had to draw out the letters in pencil with the help of a ruler, then trace over the outline of the letters in pen, and then fill them in. Would this take most people days to complete, I think not, but it did take me.Father's Day card address with stylized big font

On Monday, I looked at what I’d done and it was missing something… Rose vines! Knights always had to chop through some rose vines! So I decided to draw some vines around the address. I had to start in pencil so I could figure out how the vines, leaves, and flowers would intersect and then go back over it in pen. I’d originally thought I would then add more color and detail in the vines, but frankly, my hands were starting to really cramp at this point…

Drawing in vines on Father's Day card envelope

On Tuesday, I had to mail my card out or it wouldn’t have much hope of arriving in time for Father’s Day. But, I also had to complete the vines on the back of the envelope that I had started drawing the night before, because it just wasn’t quite perfect with only the front decorated…

I managed to get the card in the mailbox before pick up time, but it was a stressful end. I’ve decided to start my card projects much earlier in the future to save my perfectionist self from the looming deadline. Despite the time crunch, I loved this project and really poured my love for my Papi into it!


So I had a recital . . .

My recital was last Thursday. I was very prepared and feeling good about it, BUT as I sat and waited for my turn, I got more and more nervous. Basically, my brain hijacked my confidence. I need to work on getting my mind right, y’all. Anyway, my performance ended up being fine-adjacent. PLUS one of the piano kids I am in awe of (seriously y’all, this girl is insane on those keys) said that I have improved so much and she also complimented me on my tone. So, all in all, I am counting this as a win.


The Art of the Envelope

Last week I played around with a new watercolor technique, and as always I ended up with some small paintings and nothing in particular to do with them. I realized they would make the perfect little summer cards to send out to a few people, and that means DECORATING ENVELOPES!!!

I’ve had a long tradition of decorating cards and their enveloping envelopes. Like so many other good things, I got it from my mother, to whom cards were never Halmark buys while checking out at the grocery store (that was Dad’s specialty), but rather an opportunity to show one’s love through thoughtful selection and/or creation. I could always see and feel the love my Mother put into the cards she gave, and I’ve always tried to do the same.

Decorated envelopes

For obvious reasons, the addresses have been covered over and this makes the effect a little less magical, but you’ll just have to use your imagination!

Decorated envelopes

The little heart you see in the images above was just one of many little cut-out hearts all saying the same simple phrase that I made for another project years ago. Just felt like a good bonus!

Decorated envelopes

This card was an homage to how I’m still obsessed with geometric designs. During this set of envelope decorating, I discovered I like following the pattern on the front of the card onto the back. And there’s so many opportunities for spontaneity! The eight pointed star above just popped out when I was trying to create something interesting in the middle of the circle. I did however googled it in case it’s ya know associated with some hate group or a satanic cult or something, but I think we’re good.

Decorated envelopes

While I don’t have a set idea of what I want to create when I start decorating an envelope I usually do have some theme or tie-in with the card inside. These notes being summer themed, the sun was an obvious choice and I ended up using it as the design for all three of my cards.

Decorated envelopes

I love the simplicity of decorating envelopes. You have a two-sided canvas to work upon and a few rules to follow (address must be legible, stamp goes here, don’t make your mail-carrier cry). Then it’s just you and your creativity! Since I can’t use watercolor on the envelopes I’m also forced to return to some other mediums: pen, colored pencils, and pastels.

Decorated envelopes

Decorated envelopes


Community Art Project: I Am From

My mom sent me this poem template called “I Am From.” I did some more research on it and this poem template is a part of a larger community art project created to gather diverse voices and combat some of the awfulness of our world. The creators, George Ella Lyon and Julie Landsman are planning on gathering everyone’s creations and displaying them some kind of way in Washington DC. I think that what they are doing is dope and you can find more about it here.

Here is my poem.

I Am From

I am from books, from Comet, and store brand cereal.

I am from a painted red brick house,

close, magic, with stacks of books and piles of beautiful paper.

I am from geraniums,

red and lined up against the windowsill.

I am from presents on Christmas Eve and shit talking,

I am from Susan and Joan.

I am from strength and sadness,

from “You don’t have to decide right away” and “If you can read you can do anything!”

I am from communion wafers, crunchy and dry.

I am from Louisiana, black and white.

I am from grilled cheese and tomato soup with Cheetos.

I am from the journey my mom took to Liberia and back again.

I am from the curved foot of my grandmother.

My mementos are kept everywhere: on shelves, in boxes, notebooks, and in closets.

These memories are reflections and reminders of how I became me.


If you would like to write your own “I Am From” poem, here is the template! I Am From Poem (1)

Feel free to share your creations in the comments below! Regardless of whether you decide to share your poem here, definitely share it with the creators of this project! Send your submission to iamfromproject@gmail.com.

Happy writing everyone!

Masking Fluid + Washes

Recently while haunting Youtube watercolor tutorials, I’d seen a number of artists using a watercolor technique where you cover parts of your paper with masking fluid, then paint over this in a colorful wash, let it dry, then add more masking fluid, and then paint another colorful wash, etc. So, I tried it out myself this week!

I played around with applying masking fluid and then layering washes over it

For my first try, I started with a bright wash of gold, red, and some brown. I then painted some fish shapes over this with my masking fluid. Then I did a wash of blue, painted some more fish, and added some salt for fun (this created the speckled texture). Once this was all dry I did a final wash of a darker blue over it all.


I played around with applying masking fluid and then layering washes over it

For my second try, I wanted to use super bright colors in a more spotted pattern to see what that looks like, and thus I created the above tie-dye madness.


I played around with applying masking fluid and then layering washes over it

On my third painting, I returned to the fish idea, but wanted to try more fish in even more layers. I did a splotchy application of blue, green, and gold then painted some fish over this.

I played around with applying masking fluid and then layering washes over it

After another wash I added more fish and did a darker wash of blue.

I played around with applying masking fluid and then layering washes over it

Even more fish and even darker blue!

I played around with applying masking fluid and then layering washes over it

Here’s the dried result after removing all the masking fluid. I had an issue with my masking fluid taking off a lot of the underlying color, especially on the areas I first covered. I’m not sure what’s causing this, but I’m going to try another brand of masking fluid next time and see if that makes a difference. It could also be that I wasn’t leaving enough time for the paint to dry before applying the masking fluid.

I played around with applying masking fluid and then layering washes over it

Since the colors on my fish weren’t popping enough, I painted over some of them, and I love the final result!


I played around with applying masking fluid and then layering washes over it

For my last painting I tried some foliage, sticking to just an initial wash of gold and light green, with subsequent darker green washes.

This is a great technique for when I don’t feel like dealing with carefully avoiding areas in my painting, and instead just want to throw that wash down willy-nilly. It also creates a really unique look, and I’ll definitely be exploring this more in the future!


PAINT YOUR OWN POTTERY!

This past week, I took my Little to Café Monet. It is a paint your own pottery place in Austin. For those of you who have never experienced the joy of painting your own pottery here is how it works:

  1. Pick a piece of pottery. Café Monet has everything from mugs to T-Rex figurines.
  2. Choose your paints and techniques. They have stencils, paintbrushes, stamps, silk-screens, etc. Really, the options are endless.
  3. Paint your pottery.
  4. Give it to the shop to glaze and fire it.
  5. Be in awe of your finished, magical piece of pottery.

I chose to use the silk-screen technique. It is a bit similar to how stenciling works. Here is my completed pottery design pre-Step 4.


Here is my Little’s mug pre-Step 4. Her BTS obsession continues. Though you can’t see it in this picture all of the band member’s names are written on the mug. She also Googled all of their favorite colors so that she could be sure to include each member’s favorite color. Teenagers.

Here are our completed, post-Step 4 masterpieces! I am in awe!


Though I have . . . feelings about these watered down versions of certain art mediums, I am also glad that places like this make these art forms accessible. I could totally see this as a jumping off point for someone who then wants to do pottery “for real.” This injected a little creativity into my week and allowed my Little to continue to fangirl over BTS. Also, I have been needing/wanting a tray like this for my dresser so, if nothing else, I have a new place to put my jewelry.


Doodling

This post is in praise of doodlin’! After all, it’s been my longest standing creative practice, scribbling upon the edges of my notebooks and journals from as far back as I can remember right up to today. Since starting this bog I’ve been doodling less, allowing other more time-consuming art projects to act as outlets for my creative urges. Last week I realized I really miss the playful and unconscious nature of doodles. So, today I’m basking in my own doodling history to help reignite the practice!

I think school boredom is what initially caused me to develop this habit, and with eight hours stuck in a classroom every blank page became an opportunity of escape through my pen. Here’s some doodles from one of my highschool notebooks:

A doodle from my highschool notebook

Skip forward with me to right after I graduated college: I started going through all my class notebooks to get rid of whatever I didn’t want to cart about. I quickly realized that over the last four years I’d doodled in the margins of nearly every page of notes I’d taken. I had a mountain of papers all doodled upon wherever my handwriting left space. I cut these drawings out and put all the scraps of paper in a file folder. Today I spent way too long piecing just some of this collection together like a puzzle to give you a taste:

Doodles from my college notes

Doodles from my college notes

Shortly after this my doodles took a SUPER colorful turn. All the sudden I abandoned my trusty pens and became obsessed with drawing tons of chaotic scribbles in pencil and then going over these in colorful markers and erasing the remaining pencil to bring out the characters I saw within the random lines.

After college I became obsessed with creating colorful doodles

After college I became obsessed with creating colorful doodlesAfter college I became obsessed with creating colorful doodles

After college I became obsessed with creating colorful doodles

After this, my doodling took another unexpected turn when I started doodling mazes, which became more and more complex. Below are two of my most detailed mazes, which I doodled in pencil first and then went over in pen. While these are complex, I still felt like I was just doodling, as I had no predetermined picture when I drew. I was just drawing whatever lines came out and watching the picture emerge. And yes, these are real solvable mazes… assuming you can see the lines!

My first hand-drawn maze

After the mazes, I returned to completely free-form and simple doodles, mostly in journals and smaller pages. In reflection, I can see the same patterns appear over and over again throughout all my years of doodling, almost a style if you will, but also new directions and creative surges. Here are just a few doodles done more recently. I don’t know why mermaids keep appearing in my current doodles, they just do! That’s doodling for you!

A doodle of a mermaid

Doodles in my Midori journal

Some newer doodles from my journal

And this week I drew on the back cover of my new sketchbook (see my post from last week for the front), continuing my doodling tradition, following the creative urge wherever it takes me!

To end this ode to doodling, there’s no better person to sing its praises than Sarah Vaughan, who wisely tells us “If I ever have a doubt, what life is all about, I get my pencil out and then commence to doodlin'”:


Design a site like this with WordPress.com
Get started